
One of the best resources for online file management is Google Drive. From any location with an internet connection, you may upload, store, arrange, and download documents, images, and videos. Knowing how to add files, organize Google Drive, and operate with Google Drive folders can greatly simplify your digital life, regardless of your status as a professional, student, or business owner.
This tutorial will show you how to use the desktop version of Google Drive to upload files, create folders, and download your data as needed.
Why This Method Matters
Let’s take a quick look at why millions of people use Google Drive on a daily basis before getting into the how-to steps:
- Free storage: 15 GB of free storage are included with every Google account.
- Accessibility: After logging in, you can access your files from any computer.
- Cooperation: Distribute spreadsheets, presentations, and papers to other people.
- Organization: To keep data organized and accessible, use Google Drive folders.
- Backup: Protect your vital documents in case your machine malfunctions.
Let’s move on to the useful stuff, like how to upload and organize your files.
How to Add Files in Google Drive
Uploading files to Google Drive from your computer is simple. Follow these steps:
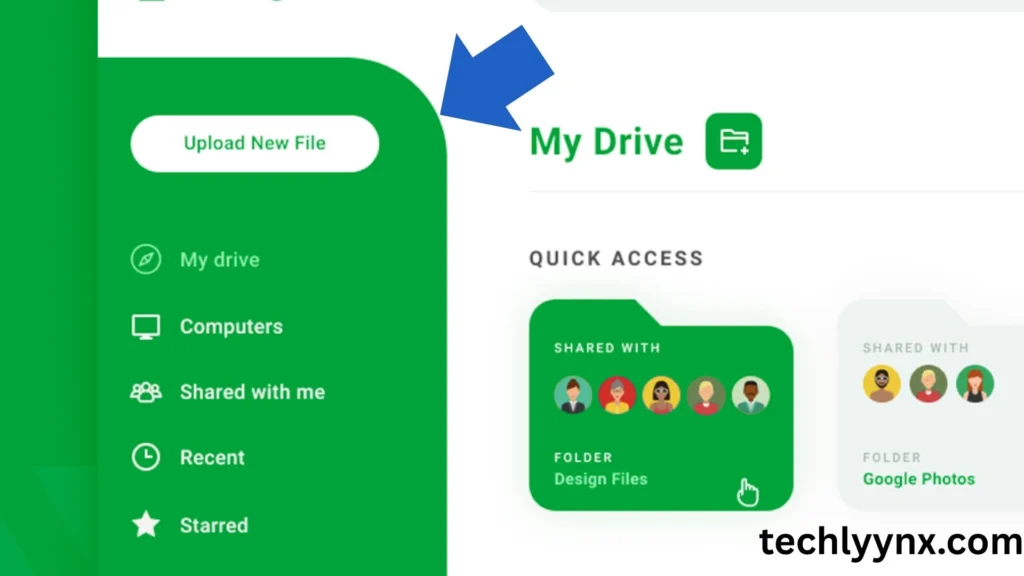
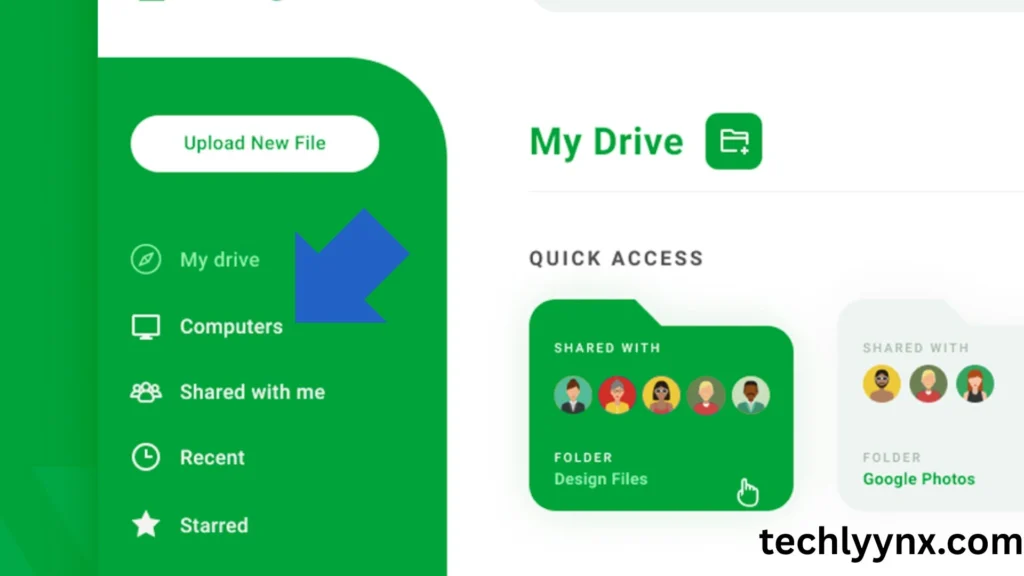
- Open Google Drive
- Go to drive.google.com.
- Sign in with your Google account.
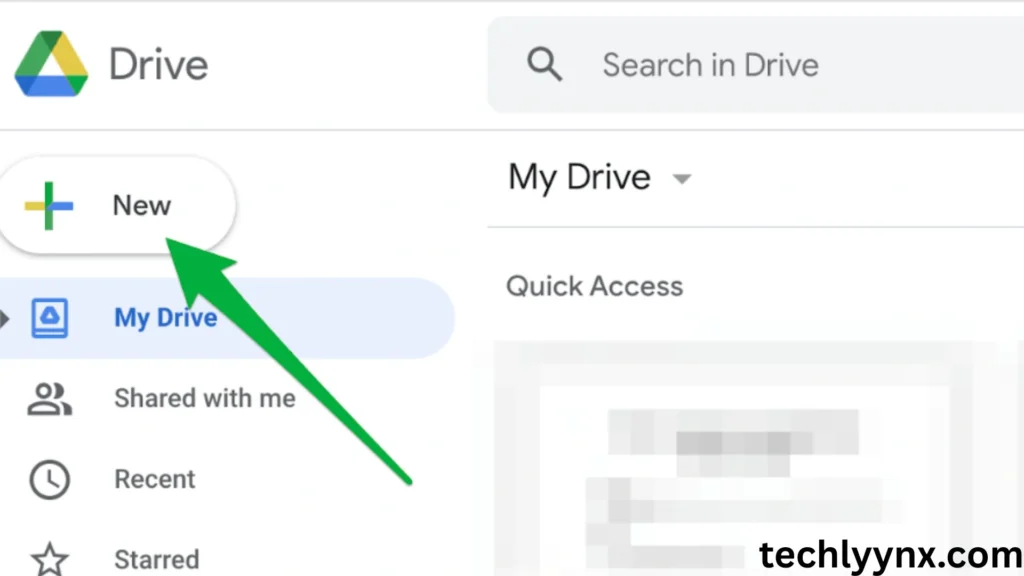
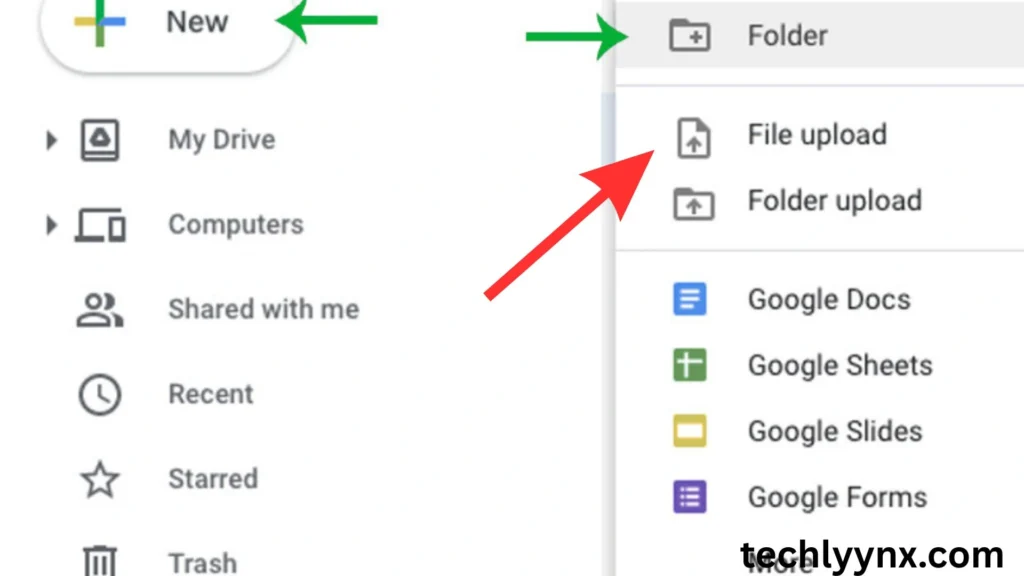
- Click the “New” Button : On the left-hand side, click the colorful + New button.
- Choose File or Folder Upload
- Select File upload to add single files (like Word documents, images, or PDFs).
- Select Folder upload if you want to add an entire folder of files.
- Select Files from Your Computer
- A window will open where you can browse your computer.
- Choose the files or folders you want to upload.
- Upload Progress
- The progress will appear at the bottom-right of your screen.
- Once completed, the files will appear in your Drive.
That’s it—you’ve learned how to add files in Google Drive using the desktop method.
How to Organize Google Drive
Your Google Drive will soon get cluttered if you continue to add files without any kind of organization. Google Drive folders should be appropriately organized to maintain efficiency.
Step 1: Make folders on Google Drive
- Launch Google Drive.
- Press the “+ New” button.
- Choose the folder.
- Name your folder something like “Work,” “School,” “Personal,” or “Projects.”
- Click “Create.”
The Drive will display your newly created folder, prepared to store files.
Step 2: Place Documents in Folders
- To relocate a file, right-click on it.
- Select “Move to.”
- Choose the desired folder.
- Press “Move.”
Additionally, you can drag & drop files straight into the folder.
Step 3: Establish Subfolders to Improve Arrangement
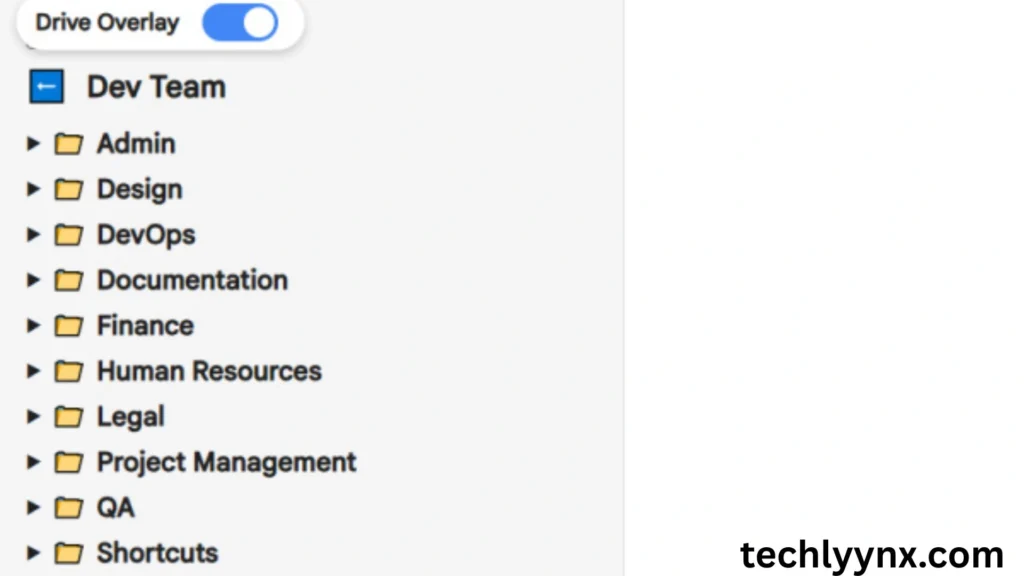
You can further organize your drive by creating folders inside folders. For instance:
- Projects for Work
- Reports
- Presentations
- Bills
- Notes from School
- Physics
- Calculation
- The chemical
Your files are now logically in this manner, much like in a filing cabinet.
Color-Code Folders in Step Four
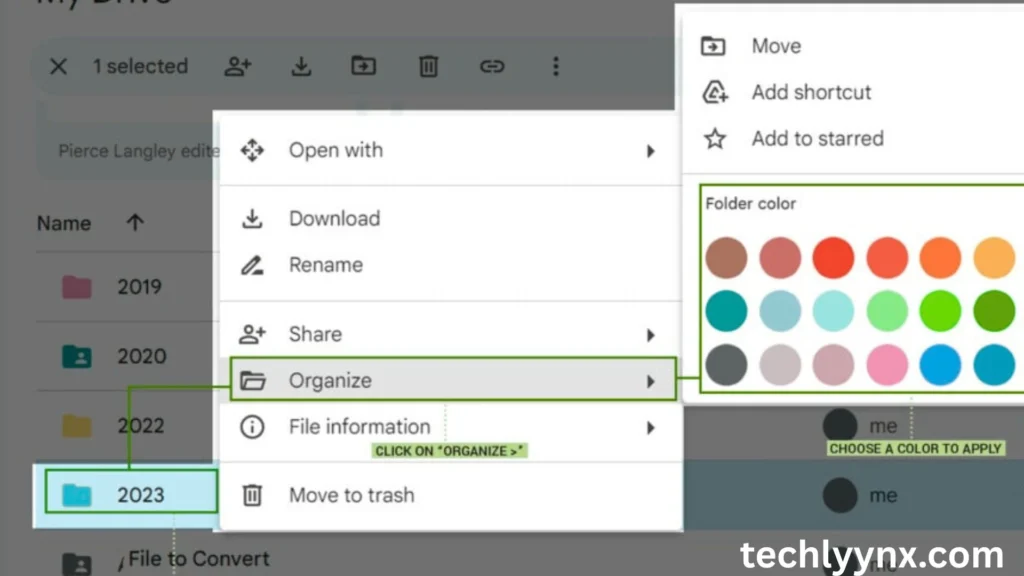
You may use Google Drive to quickly identify folders by giving them colors.
- The folder can be right-clicked.
- Choose “Change color.”
- Select a hue.
This is particularly useful if you are managing several projects concurrently.
Use the Starred Section in Step Five
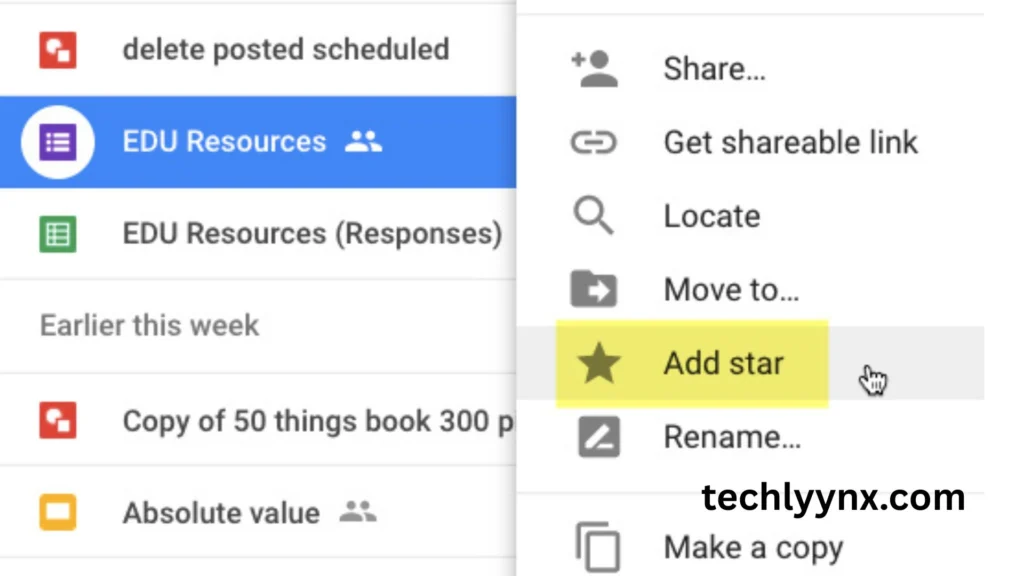
You can star specific files or folders if you require instant access to them.
- Right click on a file .
- Click “Add to Starred.
- They are now located in the left sidebar’s Starred section.
Step 6: Apply Filters and Search
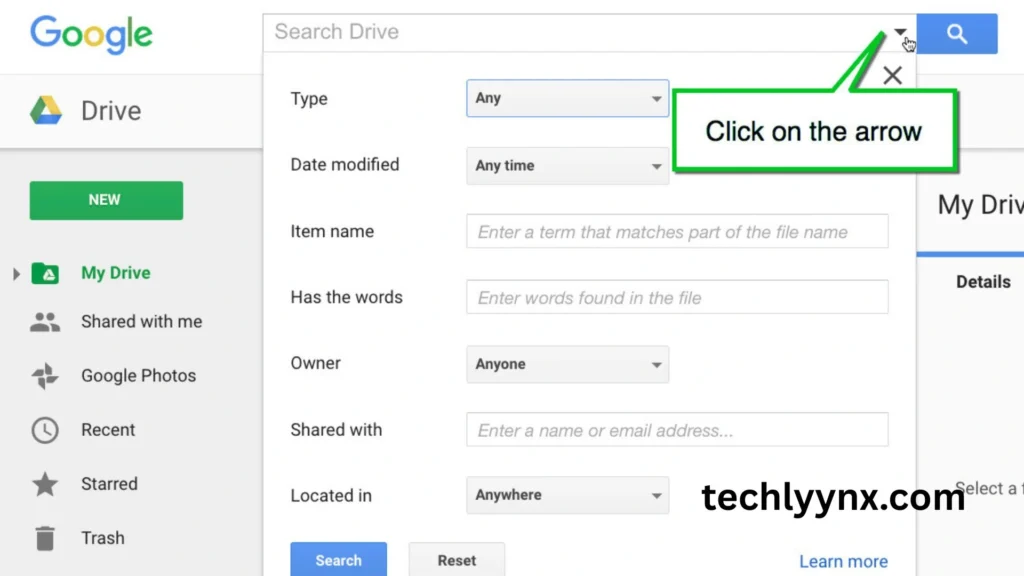
You may occasionally forget where you put something, even with folders. Google Drive has a very strong search function:
- In the search bar, type a keyword.
- Use filters such as owner, last changed date, and file type (PDF, Doc, Sheet).
Even on a huge drive, this speeds up file discovery.
How to Download Files
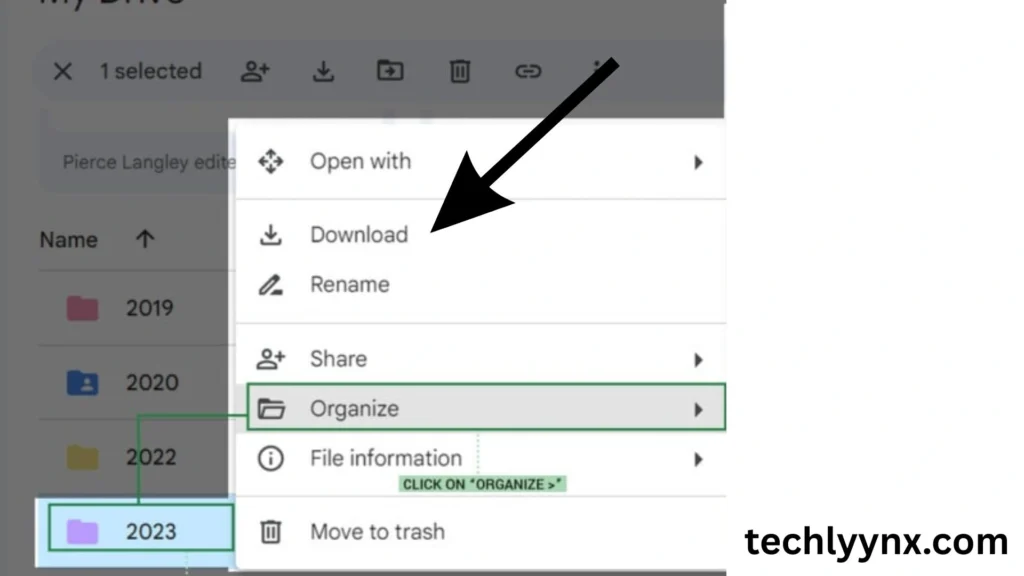
You may occasionally need to download files from Drive in order to share them on another platform, work offline, or create a backup.
Getting Just One File
- Right click on a file .
- Press the “Download” button.
- The download will be saved to the Downloads folder on your computer.
Obtaining Several Files
- Holding Shift allows you to choose numerous files continuously, while holding Ctrl/Cmd allows you to select different files.
- With a right-click, choose “Download.”
- A ZIP file will be created by compressing the files.
Obtaining Folders
- The folder can be right-clicked.
- Click “Download.”
The folder will be compressed into a ZIP file and downloaded via Google Drive.
Best Practices for Google Drive Organization
Now that you understand how to upload and manage files, follow these tips to keep things organized:
File names should be clear: “Report_March2025.pdf” is preferable to “final_version(2).pdf.”
Put files in a logical group: Organize similar files in a single Google Drive folder.
Clean up frequently: Eliminate outdated or redundant files.
Use shortcuts: To conserve space, make shortcuts rather than copying files.
Verify storage capacity: Pay attention to your 15 GB restriction.
Advantages of Using Folders
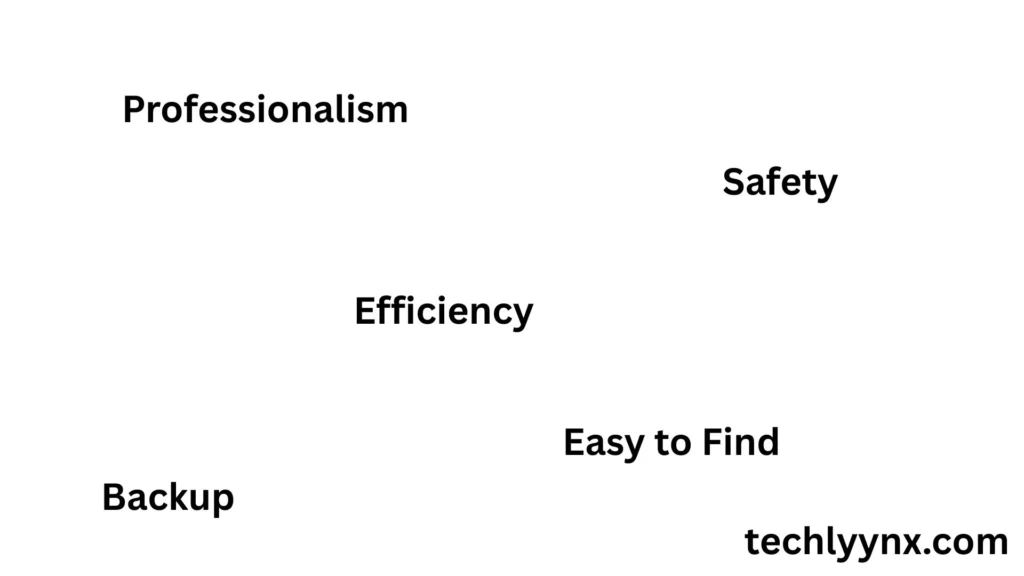
- Efficiency: Quickly find what you need.
- Professionalism: A neat structure shows professionalism when sharing files.
- Backup and Safety: Even if your computer crashes, your Drive folders are safe.
- Time-Saving: Less time wasted searching, more time spent working.
Final Thoughts
Google Drive is more than just a cloud storage tool—it’s a complete file management system. By learning how to add files in Google Drive, organize Google Drive folders, and download files, you can save time, stay organized, and keep your work safe.
Think of Google Drive as your digital workspace. If you set it up properly with folders and clear file names, you’ll never lose track of important documents again.
Start by creating a simple folder structure today, upload a few files, and practice moving and downloading them. Very soon, managing Google Drive will feel second nature.